
 (2)")
")

20 Effective Ways For Sealing Air Leaks In Homes
Sealing air leaks in your home isn’t just a mundane home improvement task; it’s a critical step toward boosting your home’s energy efficiency and comfort. When your home is properly sealed, you’re not just keeping the cold or hot air inside – you’re saving yourself from hefty energy bills and creating a more comfortable living environment. In this guide, we’ll explore 20 effective ways to seal air leaks in your home. From simple DIY projects to more complex tasks, these strategies can help you reduce your energy consumption, lower your carbon footprint, and create a healthier indoor environment.

Why is air sealing important?
Air leaks can creep in through cracks, gaps around windows, doors, or even unsealed areas around plumbing and electrical outlets. This not only forces your heating or cooling system to work overtime, but it also leads to a significant waste of energy. By eliminating these leaks, you could see a tangible reduction in your monthly energy expenses.
Aside from energy savings, there’s also the fresh perspective of better indoor air quality. Airborne pollutants and allergens often take advantage of unsealed leaks, diminishing your home’s air quality. By tackling the problem of air leaks, you’re essentially providing a healthier environment for you and your family.
Experts highlight the importance of regularly checking for air leaks, especially in older homes where wear and tear might make leaks more prevalent. It’s a proactive measure that could ward off many potential issues down the line, ensuring your living space is both comfortable and economical.
20 Effective Ways to Seal Air Leaks in Homes
- Grab some caulk and weatherproof your windows and doors. It’s simple, and you might be amazed at the difference it makes. Focus especially on areas where different materials meet.
- Install weatherstripping around door frames. This helps to create a tight seal when the door is closed, effectively blocking out drafts.
- Use door sweeps at the bottom of doors to prevent air from leaking underneath. These can cut down significantly on the air exchange between your home and the wild outdoors.
- For older windows, consider adding plastic window film. It’s a temporary fix, but it does wonders during colder months.
- Consider foam insulation for gaps around plumbing and electrical openings. Spray foam can easily fill those irregular spaces that are often overlooked.
- Seal electrical outlets and switch plates on exterior walls using foam gaskets to stop drafts.
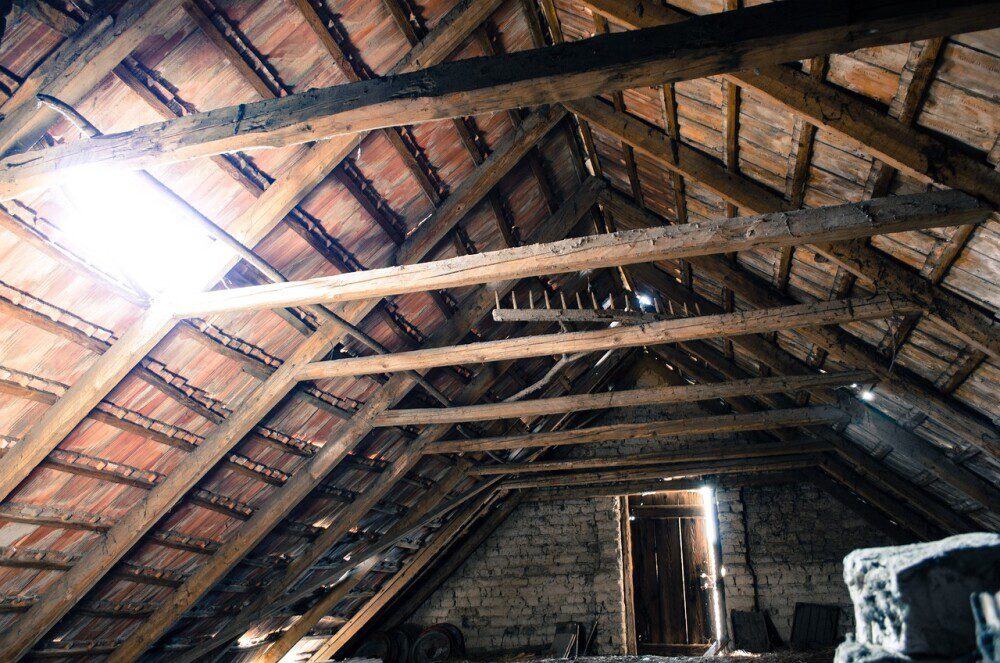
- Don’t forget about the attic. Use insulation to plug leaks around the attic entrance and any gaps in the roofline.
- Basements are often drafty. Add or replace door thresholds and insulation in unfinished spaces.
- Apply foam sealant on larger gaps, especially around ducts, pipes, and wiring.
- Don’t overlook the vents. Use sealant tape to seal leaks in ductwork, cutting down on heating and cooling losses.
- Chimneys can be a real culprit. A chimney balloon is a smart, removable solution that blocks drafty leaks when the fireplace is not in use.
- Attach insulated curtains or thermal blinds. These provide an additional layer against air leaks at night or in specific seasons.
- Weatherproofing tape is another toolkit essential. Apply it where you suspect air might sneak in, including around windows and doors.
- Be strategic with ventilation fans. Ensure they have a damper to prevent backdrafts.
- Install a storm door to add an extra layer of protection. It improves your home’s insulation and keeps the elements at bay.
- Consider an energy-efficient upgrade. Replacement windows can be costly, but they are often more airtight and reduce overall energy use.
- Use door snakes or draft stoppers at the base of your doors to prevent air from slipping through.
- Exterior caulking is a must for visible cracks around building foundations.
- Foil sheets or reflectors behind radiators on exterior walls can help deflect heat back into the room.
- Use self-adhesive foam tape for quick fixes on windows and doors that don’t require a permanent change.
Tools and Techniques for Detecting and Sealing Air Leaks
Finding and sealing air leaks effectively requires the right tools and techniques. Having these essentials on hand ensures you tackle the job with a level of precision and thoroughness, enhancing your home’s efficiency.
One of the most practical tools is a smoke pen or incense stick. By moving it along suspected areas around windows, doors, or any possible gaps, you can see if the smoke is disturbed, pinpointing where the leaks are. It’s like having a detective at your fingertips, helping you trace those sneaky leaks.
Infrared cameras, though a bit of an investment, offer a high-tech method to detect leaks with precision. They show temperature variations on surfaces, making it clear where the outside air is coming in. Consider renting one if you’re planning a thorough inspection.

- ENHANCED THERMAL CLARITY: Start with 128×128 thermal imaging and enhance to 240×240 resolution with TISR technology for greater details. The wide 40ºx 30ºfield of view and a 25Hz refresh rate deliver accurate, smooth thermal images—ideal for detailed inspections in homes and on electrical systems and machinery.
- LONGER RUNTIME, FEWER CHARGES: Designed for efficiency, this thermal imaging camera gives you 15 hours of power and automatic shut-off options at 5, 10, and 20-minute intervals to extend battery life. Keep going without the hassle of frequent charging, no matter how long your inspections last.

- [Upscaled Thermal Resolution]: The sensor IR Resolution is 96×96. By enabling the SuperIR image enhancement technology before inspections, the ECO thermal imager will upscale the resolution from 96 x 96 (9,216 pixels) to 240 x 240 (57,600 pixels) when viewing live and capturing photos.
- [Ideal Thermal Problem Finder]:HIKMICRO E01 thermal camera is a good helper and a nice tool for homeowners or handymen to inspect thermal anomalies. It assists you in better finding the problems of House Missing Insulations, Air Leaks, Water Damage, HVAC thermal anomalies, and Automotive, Electrical, and Mechanical failures. Ideal thermal problem finder in daily life.

- [Upscaled Thermal Resolution]: Powered by HIKMICRO SuperIR image enhancement technology, it upscales thermal images from 96 x 96 (9,216 pixels) to 240 x 240 (57,600 pixels) when viewing live with 25 Hz fast image frequency and capturing photos.
- [Ideal Thermal Problem Finder]:HIKMICRO Eco thermal camera is a good helper and a nice tool for homeowners or handymen to inspect thermal anomalies. It assists you in better finding the problems of House Missing Insulations, Air Leaks, Water Damage, HVAC thermal anomalies, and Automotive, Electrical, and Mechanical failures. Ideal thermal problem finder in daily life.
Caulk guns and caulk are staples for any serious sealing project. They allow you to precisely apply sealant to cracks and gaps, ensuring a tight barrier against air leaks.
Weatherstripping kits come in various forms, from adhesive-backed foam to more heavy-duty metal spring strips. Each type has its application, but they all serve the purpose of sealing air pathways.
No products found.
Home energy audit kits can provide comprehensive insights. They often include tools like infrared thermometers, smoke sticks, and moisture meters, helping to identify not just where leaks are but also prioritize the biggest problem areas.
Beyond tools, the methodical approach is crucial. Start from the bottom of the house and work your way up since warm air rises. This ensures you’re sealing in the most efficient manner, preventing heat from escaping upwards.
Regularly inspect and re-check areas even after sealing. Elements and seasonal changes can shift materials, creating new gaps. A quick periodic check can maintain airtight integrity.
Enhancing Home Comfort and Efficiency

Sealing air leaks brings a host of benefits that go beyond just cutting down on energy expenses. By preventing drafts, your home becomes significantly more comfortable, maintaining a consistent indoor temperature all year round. You’ll find that your HVAC system doesn’t have to work overtime, prolonging its lifespan and reducing maintenance costs.
It’s important to keep up with regular inspections and maintenance to ensure new leaks aren’t emerging over time. Simple seasonal checks can let you catch problems early, maintaining efficiency and comfort.
Beyond saving money, sealing air leaks contributes positively to the environment by reducing your carbon footprint. Lower energy consumption translates to fewer emissions, which is something every homeowner can feel good about. Taking the time now to address air leaks means setting your home up for efficiency and comfort that lasts. Encourage a proactive approach in identifying potential weak spots and addressing them with the tips and tools outlined. The comfort and efficiency improvements lead not only to savings but also to a more sustainable and enjoyable living environment. Prioritize sealing those leaks, and enjoy the benefits of a home that feels snug and efficient, through every season.
Ready to save on your energy bills? Explore our blog for more energy-saving tips. Do you have any favorite energy-saving hacks? Share them in the comments below!


